كيف تُرسل بريدًا إلكترونيًّا يحتوي على نطاق محدد من الخلايا من Excel؟
غالبًا ما تحتاج إلى مشاركة بيانات أو تقارير مهمة مع الآخرين مباشرةً من مصنف Excel الخاص بك، ويُعدّ تضمين نطاق محدد من محتوى الخلايا في نص بريدك الإلكتروني وسيلة فعّالة توفر لك الوقت وتضمن الدقة. فعلى سبيل المثال، يتيح لك إرسال ملخصات مالية مختارة أو درجات طلاب أو بيانات جرد مباشرةً من Excel عبر البريد الإلكتروني تمكين المستلمين من الاطّلاع على المعلومات الأساسية فورًا دون الحاجة لفتح مرفق. ويشرح هذا المقال طرقًا عملية لإرسال بريد إلكتروني يتضمّن تحديد النطاق ضمن نص الرسالة، مما يساعدك على تبسيط التواصل ومشاركة البيانات بسلاسة مباشرةً من Excel.
إرسال بريد إلكتروني من نطاق محدود من الخلايا في Excel
إرسال بريد إلكتروني من نطاق محدود من الخلايا باستخدام أداة رائعة
مزيد من الدروس التعليمية حول إرسال البريد في Excel...
إرسال بريد إلكتروني من نطاق محدود من الخلايا في Excel
إذا كنت تفضّل حلاً مدمجًا وقابلًا للتخصيص، فإن استخدام كود VBA داخل Excel يُعد وسيلة فعّالة لنسخ نطاق خلايا معيّن ولصقه تلقائيًا في نص رسالة بريد Outlook. وهي الطريقة المثالية للمستخدمين الذين يعتمدون على Microsoft Outlook كعميل بريدهم الإلكتروني بشكل منتظم ويرغبون في أتمتة إرسال الرسائل مباشرةً من Excel. إليك كيفية تنفيذ ذلك:
1. افتح ورقة العمل التي تحتوي على نطاق الخلايا الذي ترغب في تضمينه في بريدك الإلكتروني. اضغطAlt + F11 معًا لتشغيل نافذةMicrosoft Visual Basic for Applications. يُمكّنك هذا الاختصار من الوصول بسرعة إلى محرر VBA لإدراج الكود.
2. في نافذة محرر VBA، انقرأدوات > المراجع. تأكد من اختيار المصنف الصحيح، خاصةً إذا كانت لديك عدة ملفات مفتوحة.
3. في مربع الحوارالمراجع – VBAProject، قم بالتمرير لأسفل وحدد خيارمكتبة كائنات Microsoft Outlook. يُمكّنك تمكين هذا المرجع من التفاعل بين VBA وOutlook، مما يسمح لك بإنشاء رسائل بريد إلكتروني وإرسالها مباشرةً. بعد تحديد المربع، انقرموافق.

4. من شريط القوائم، انقرإدراج > وحدة نمطيةلإضافة وحدة كود جديدة. بعد ذلك، انسخ والصق كود VBA التالي في نافذة الوحدة.
كود VBA: إرسال بريد إلكتروني مع نطاق محدود في Excel
Sub Send_Email()
'Updated by Extendoffice 20200119
    Dim xRg As Range
    Dim I, J As Long
    Dim xAddress As String
    Dim xEmailBody As String
    Dim xMailOut As Outlook.MailItem
    Dim xOutApp As Outlook.Application
    On Error Resume Next
    xAddress = ActiveWindow.RangeSelection.Address
    Set xRg = Application.InputBox("Please select range you need to paste into email body", "KuTools For Excel", xAddress, , , , , 8)
If xRg Is Nothing Then Exit Sub
Application.ScreenUpdating = False
    Set xOutApp = CreateObject("Outlook.Application")
    Set xMailOut = xOutApp.CreateItem(olMailItem)
    For I = 1 To xRg.Rows.Count
        For J = 1 To xRg.Columns.Count
            xEmailBody = xEmailBody & "  " & xRg.Cells(I, J).value
        Next
        xEmailBody = xEmailBody & vbNewLine
    Next
    xEmailBody = "Hi" & vbLf & vbLf & " body of message you want to add" & vbLf & vbLf & xEmailBody & vbNewLine
    With xMailOut
        .Subject = "Test"
        .To = "happy.xuebi@163.com"
        .Body = xEmailBody
        .Display
        '.Send
    End With
    Set xMailOut = Nothing
    Set xOutApp = Nothing
    Application.ScreenUpdating = True
End Sub
ملاحظات:
- 1). يمكنك تخصيص المحتوى والتحية في السطرxEmailBody = «Hi» & vbLf & vbLf & " body of message you want to add" & vbLf & vbLf & xEmailBody & vbNewLine حسب احتياجاتك. على سبيل المثال، قد ترغب في إضافة رسالة مخصصة أو تعليمات قبل بيانات Excel.
- 2). عدّل المستلم والموضوع بتعديل هذا السطر: .To = happy.xuebi@163.com و.Subject = «Test». تأكد من صحة عنوان بريد المستلم لتجنب أي مشكلات في التسليم.
5. لتشغيل الكود، اضغطF5 في محرر VBA. عند ظهور مربع حوار Kutools لـ Excel، اختر نطاق الخلايا الذي تريد تضمينه في نص البريد الإلكتروني، ثم انقرموافق. إذا اخترت النطاق الخطأ، يمكنك إعادة بدء العملية أو تعديل التحديد.

6. سيتم إنشاء بريد إلكتروني تلقائيًا في Outlook، مُضمنًا المستلم المحدَّد، والموضوع، والرسالة التي أدخلتها، بالإضافة إلى بيانات Excel في نص البريد. راجع الرسالة قبل الإرسال للتأكُّد من عرض جميع البيانات بشكلٍ صحيح، ثم انقر على زرإرساللتسليم بريدك الإلكتروني.

ملاحظة:تعمل طريقة VBA هذه فقط عندما يكون Microsoft Outlook مثبّتًا ومضبوطًا كعميل البريد الإلكتروني الافتراضي لديك. إذا كنت تستخدم برامج بريد إلكتروني أخرى، ففكّر في حل بديل كما هو موضح أدناه. بالإضافة إلى ذلك، إذا لم يكن Outlook قيد التشغيل، فسيقوم الماكرو بتشغيله تلقائيًّا نيابةً عنك.
القيود:تتطلب هذه الطريقة وجود Outlook وأذونات مناسبة للوصول إلى وظائف البريد الإلكتروني. إذا كانت مؤسستك تقيّد استخدام الماكرو أو الوصول إلى Outlook، فقد لا تكون هذه الطريقة قابلة للتطبيق.
إرسال بريد إلكتروني من نطاق محدود من الخلايا باستخدام أداة رائعة
للمستخدمين الذين لا يستخدمون Outlook أو يفضلون طريقة أبسط وخالية من الأكواد، تقدّم أداة Kutools لـ Excel حلاً مباشرًا لإرسال رسائل بريد إلكتروني تحتوي على نطاقات خلايا محددة. فبفضل ميزة «إرسال بريد إلكتروني» في Kutools، يمكنك بسهولة تهيئة خادم صادر (SMTP) وإرسال رسائل البريد الإلكتروني عبر أي حساب بريد إلكتروني مدعوم—مثل Gmail أو Yahoo أو بريد شركتك—مباشرةً من Excel، مما يجعلها خيارًا مثاليًا للعمل في بيئات متنوعة أو مشاركة المعلومات مع عدة مستلمين بسلاسة وفعالية.
لاستخدام هذه الطريقة، يُرجى اتباع الخطوات التالية:
1. أولًا، عليك إعداد قائمة البريد الإلكتروني مع تضمين الحقول المطلوبة.
- نصائح:يجب أن تحتوي قائمة البريد الإلكتروني على صفّين على الأقل: أحدهما للعناوين والآخر (أو أكثر) للبيانات الفعلية. على سبيل المثال، عند إرسال بريد إلكتروني إلى شخصين، أضف كلا العنوانين تحت رأس «البريد الإلكتروني» كما هو موضح في لقطة الشاشة أدناه.

- إذا كنت ترغب في إنشاء قائمة بريد إلكتروني بسرعة، جرّب ميزةإنشاء قائمة البريد الإلكترونيللإعداد التلقائي.

2. بعد ذلك، حدد نطاق Excel الفعلي الذي ترغب في لصقه في نص رسالة البريد الإلكتروني، ثم اضغطCtrl + C لنسخه. تأكد من نسخ الخلايا الضرورية فقط لضمان وضوح بريدك الإلكتروني.
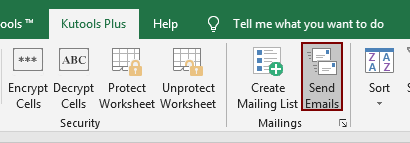
3. حدد قائمة البريد الإلكتروني بأكملها (بما في ذلك العناوين)، ثم انتقل إلىKUTOOLS PLUS > إرسال رسائل بريد إلكتروني.
4. سيظهر مربع حوار «إرسال رسائل بريد إلكتروني» مع عرض الحقول المعبأة من قائمة البريد الإلكتروني المحددة.
- 4.1) راجع العناصر وقم بتعديلها في مربع الحوار حسب الحاجة. يمكنك إضافة المزيد من الحقول إلى قائمة البريد الإلكتروني إذا كنت بحاجة إلى رسائل مخصصة أو معلومات إضافية.
- 4.2) انقر داخل مربع «نص البريد الإلكتروني»، ثم اضغطCtrl + V للصق النطاق الذي نسخته. وأضف أي نص إضافي أو تعليمات عند الحاجة، مع التأكد من أن رسالة البريد الإلكتروني واضحة ومفيدة.
- 4.3) تأكد من أن خيار «إرسال باستخدام Outlook» غيرمحددإذا كنت تريد الإرسال عبر SMTP (خدمات بريد إلكتروني أخرى).
- 4.4) انقرإعدادات SMTPلتكوين إعدادات SMTP لحساب بريدك الإلكتروني، وهو مطلوب للإرسال المباشر من حسابات غير Outlook.


5. في مربع الحوار «إعدادات خادم البريد الإلكتروني (SMTP – مخطط جديد)»، املأ جميع التفاصيل المطلوبة، مثل عنوان بريدك الإلكتروني وخادم SMTP ورقم المنفذ وبيانات اعتماد المصادقة. ولتتبع مراسلاتك بسهولة، يمكنك تحديد مربع «حفظ الرسائل المرسلة إلى» لاختيار مجلد مخصص لحفظ رسائل البريد المرسلة. بعد الانتهاء من الإعدادات، انقرموافقللتأكيد.

6. ستعود إلى نافذة «إرسال رسائل بريد إلكتروني». تحقق مجددًا من جميع الحقول والمحتوى الملصق للتأكد من دقته، ثم انقرإرساللتسليم بريدك الإلكتروني. سيتم إرسال البريد الإلكتروني عبر الخادم المهيأ مباشرةً من Excel، وستتلقى تأكيدًا أو حالةً تعكس نتيجة الإرسال.
المزايا:يدعم Kutools إرسال رسائل البريد الإلكتروني من أي حساب مفعّل ببروتوكول SMTP تقريبًا—وليس من Outlook فقط—مما يجعله الخيار المثالي للمستخدمين الذين يستخدمون بريد الويب، أو يعملون عبر نطاقات متعددة، أو يبحثون عن واجهة سهلة الاستخدام دون الحاجة إلى كتابة ماكرو.
عند استخدام Kutools، تأكد من مراجعة إعدادات الخادم بدقة لتجنب أخطاء فشل تسليم الرسائل. وإذا لم تُرسَل رسائلك الإلكترونية، فتحقق من اتصال الشبكة، وعنوان الخادم، والمنفذ، وبيانات اعتماد تسجيل الدخول.
لإرسال رسائل جماعية، تأكّد دائمًا من مراجعة رسالة واحدة على الأقل قبل الإرسال الجماعي لتصحيح أي مشكلات قد تظهر في العرض أو التخصيص.
مقالات ذات صلة:
إرسال بريد إلكتروني إلى عناوين البريد الإلكتروني المحددة في خلايا Excel
لنفترض أن لديك قائمة بعناوين البريد الإلكتروني وترغب في إرسال رسالة بريد إلكتروني إلى هذه العناوين دفعةً واحدة مباشرةً من Excel. كيف يمكنك تحقيق ذلك؟ سيعرض لك هذا المقال طرقًا لإرسال بريد إلكتروني إلى عدة عناوين بريد إلكتروني محددة في خلايا Excel.
إدراج توقيع Outlook عند إرسال بريد إلكتروني من Excel
لنفترض أنك تريد إرسال بريد إلكتروني مباشرةً من Excel، فكيف تضيف توقيع Outlook الافتراضي إليه؟ يقدم لك هذا المقال طريقتين فعّالتين لإدراج توقيع Outlook تلقائيًا عند إرسال بريد إلكتروني من Excel.
إرسال بريد إلكتروني مع عدة مرفقات من Excel
يتناول هذا المقال كيفية إرسال بريد إلكتروني عبر Outlook مع عدة مرفقات مباشرةً من Excel.
إرسال بريد إلكتروني تلقائيًا عند اقتراب تاريخ الاستحقاق في Excel
على سبيل المثال، إذا كان تاريخ الاستحقاق في العمود C أقل من أو يساوي 7 أيام (مع افتراض أن التاريخ الحالي هو 2017/9/13)، فسيتم إرسال تذكير بالبريد الإلكتروني تلقائيًا إلى المستلم المحدد في العمود A، متضمّنًا المحتوى الموجود في العمود B. كيف يمكنك تنفيذ ذلك؟ يقدم لك هذا المقال طريقة مفصلة باستخدام VBA لإتمام هذه المهمة بسلاسة.
إرسال بريد إلكتروني تلقائيًا بناءً على قيمة خلية في Excel
لنفترض أنك تريد إرسال بريد إلكتروني تلقائيًا عبر Outlook إلى مستلم معيّن بمجرد أن تتجاوز قيمة خلية محددة في Excel عتبةً معينة. على سبيل المثال، عندما تكون قيمة الخلية D7 في ورقة العمل أكبر من 200، يُنشأ البريد الإلكتروني تلقائيًا. يقدم لك هذا المقال حلاً سريعًا باستخدام VBA لتحقيق ذلك.
أفضل أدوات الإنتاجية لمكتبتك
عزِّز مهاراتك في Excel باستخدام Kutools لـ Excel، وعايش الكفاءة كما لم تفعل من قبل.يقدّم Kutools لـ Excel أكثر من 300 ميزة متقدمة لتعزيز الإنتاجية ووقت الحفظ.انقر هنا للحصول على الميزة التي تحتاجها أكثر من غيرها...
يجلب Office Tab واجهة ذات علامات تبويب إلى Office، ويجعل عملك أسهل بكثير
- تمكّن من التحرير والقراءة باستخدام علامات التبويب في Word وExcel وPowerPoint، وPublisher وAccess وVisio وProject.
- افتح وأنشئ مستندات متعددة في علامات تبويب جديدة داخل النافذة نفسها، بدلاً من فتح نوافذ جديدة.
- يزيد إنتاجيتك بنسبة 50% ويوفّر لك مئات نقرات الفأرة كل يوم!
جميع الإضافات من Kutools في برنامج تثبيت واحد!
Kutools for Office حزمةٌ تحتوي على إضافاتٍ مخصصة لتطبيقات Excel وWord وOutlook وPowerPoint، إلى جانب Office Tab Pro، مما يجعلها الخيار المثالي للفِرق التي تعمل عبر تطبيقات Office.
- حزمة شاملة واحدة— إضافات Excel وWord وOutlook وPowerPoint بالإضافة إلى Office Tab Pro
- برنامج تثبيت واحد، ترخيص واحد— الإعداد خلال دقائق (جاهز لـ MSI)
- يعمل بشكل أفضل معًا— إنتاجية ميسَّرة عبر تطبيقات Office
- تجربة مجانية لمدة 30 يومًا بكامل الميزات— بدون تسجيل، بدون بطاقة ائتمان
- أفضل قيمة— وفِّر مقارنةً بشراء الإضافات بشكل منفصل